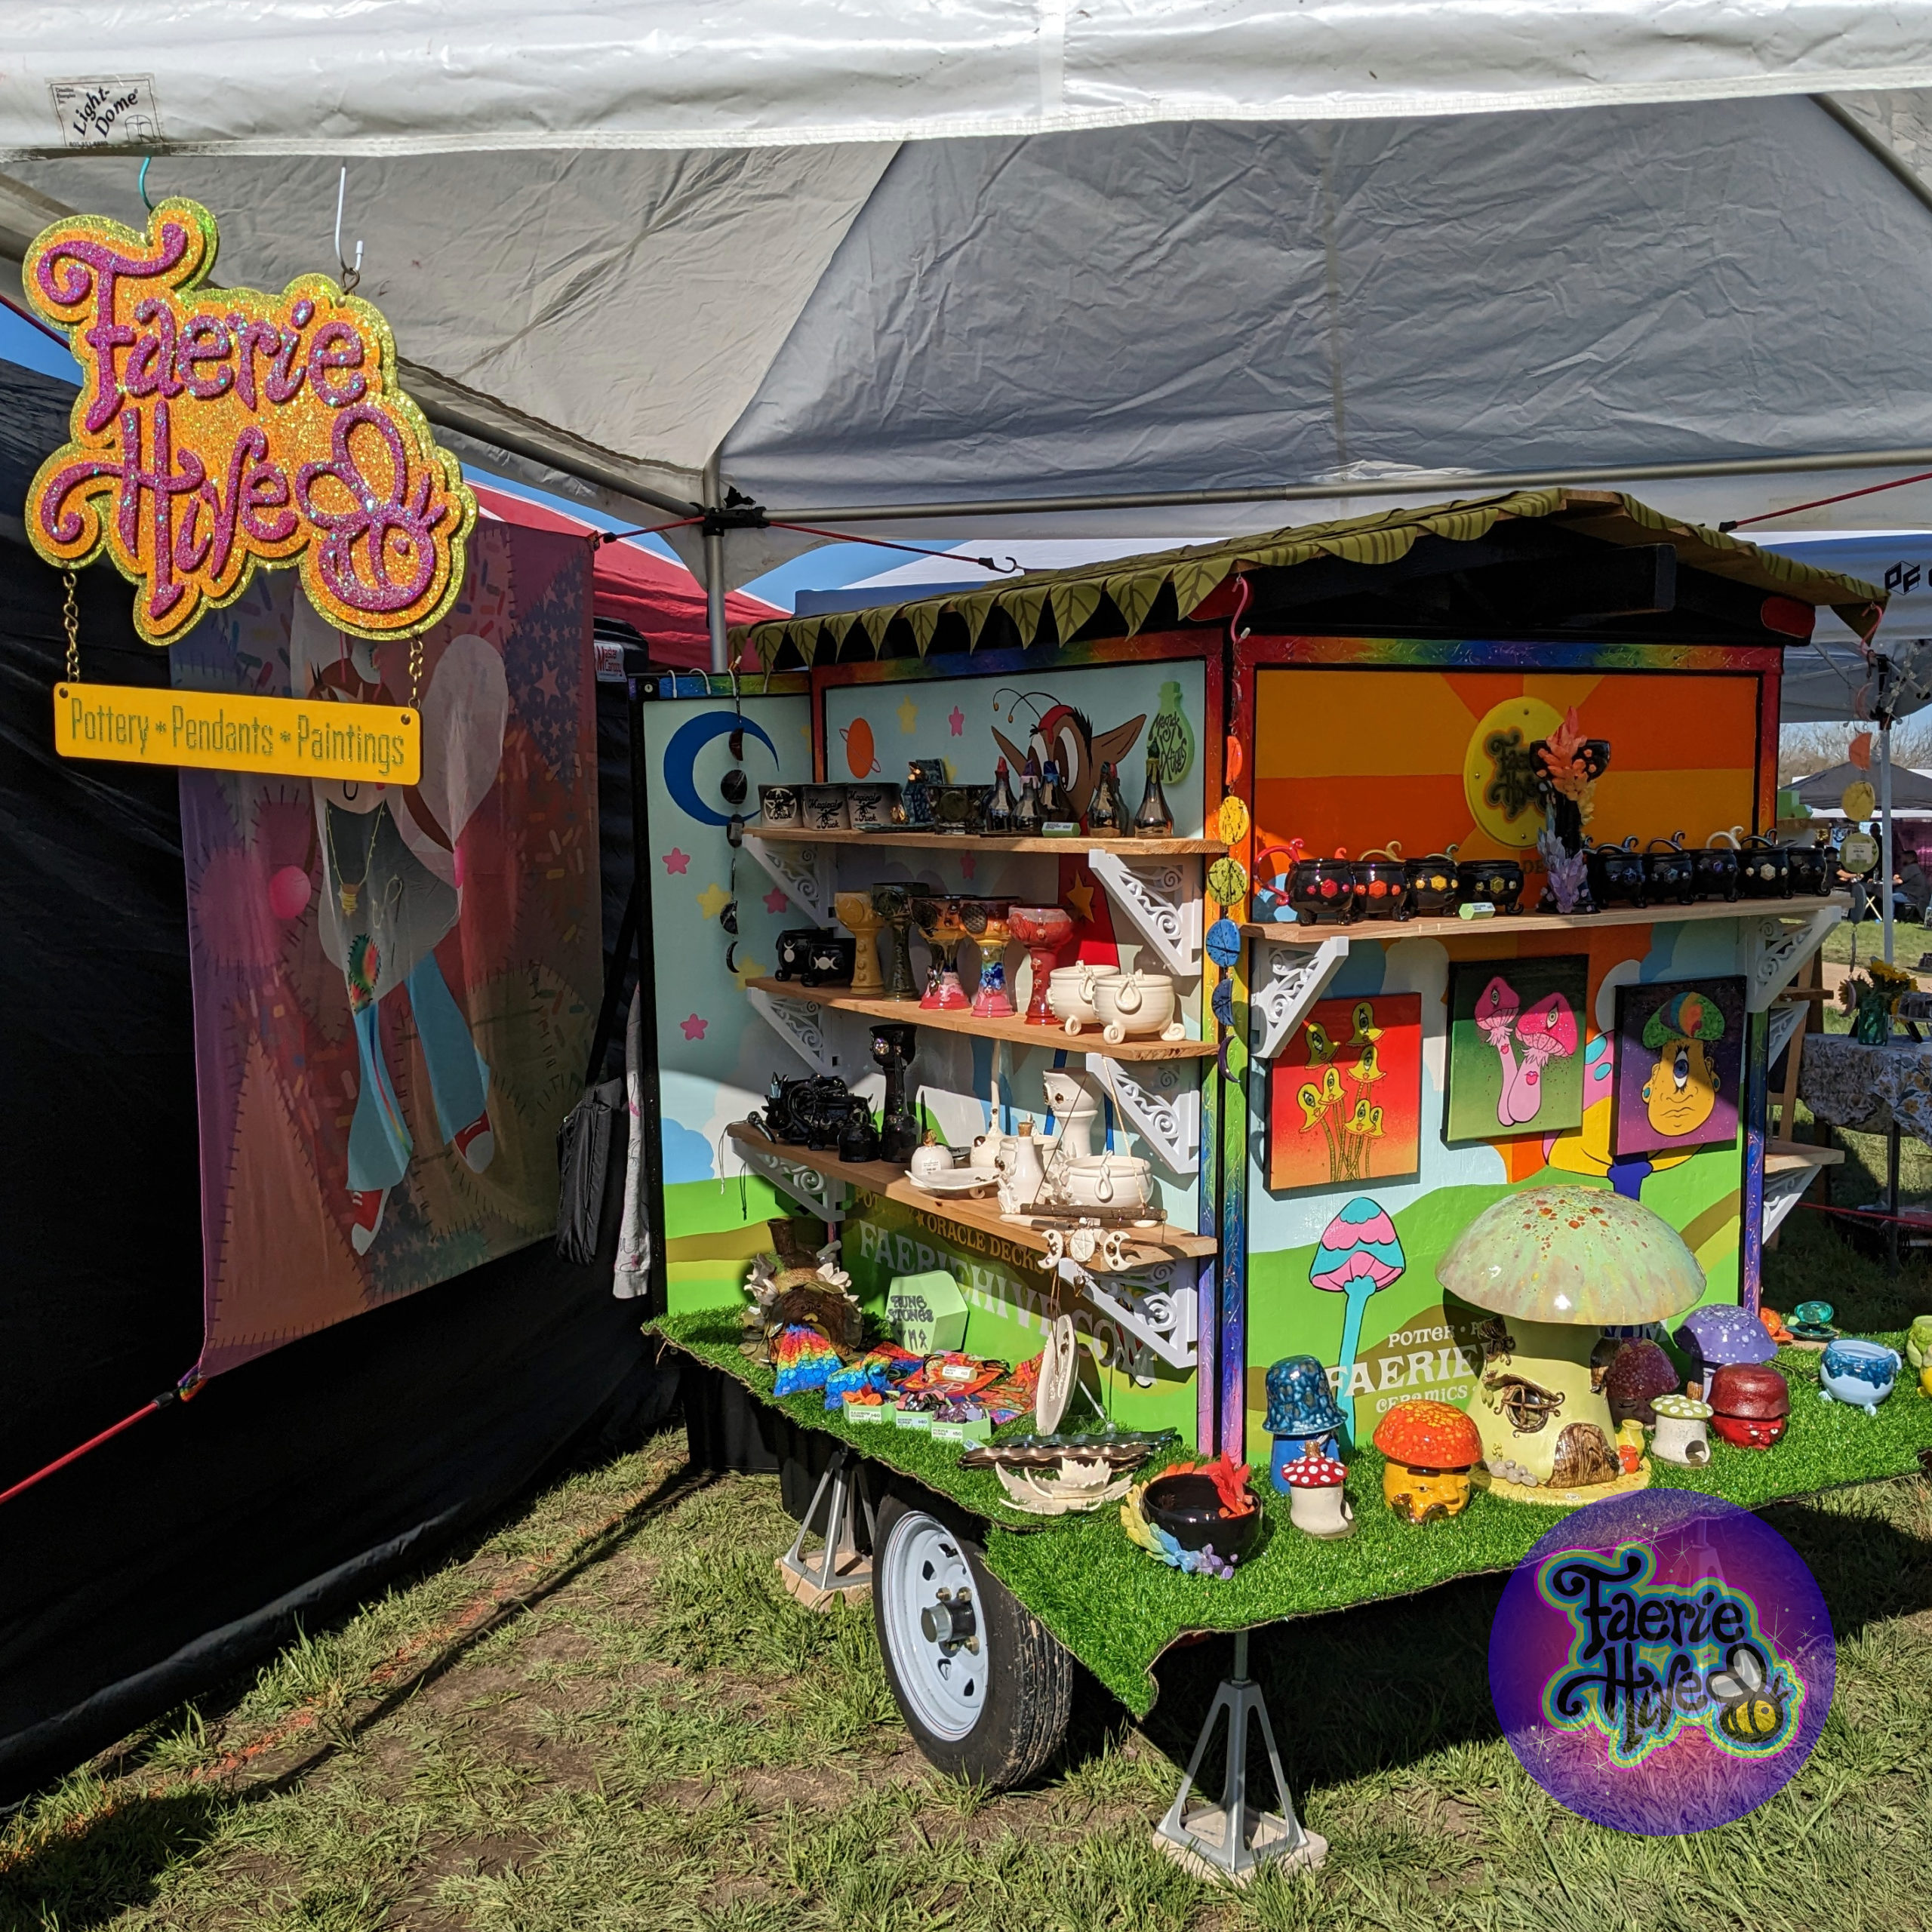
I’ve made lots of “Maker Merit Badges” for my local makerspace in the past. In making them, it was my intention to release them into the wild, free for anyone to use. Today they are officially available for makin’ stuff!
They’re all in .svg format, so you can vinyl cut, 3D print, laser cut, CNC, embroider, etc. your own maker badge to show off your maker creds. 😎
Visit the repository here on Github; my friend Tommy and I welcome new badge contributions. Share and share alike!
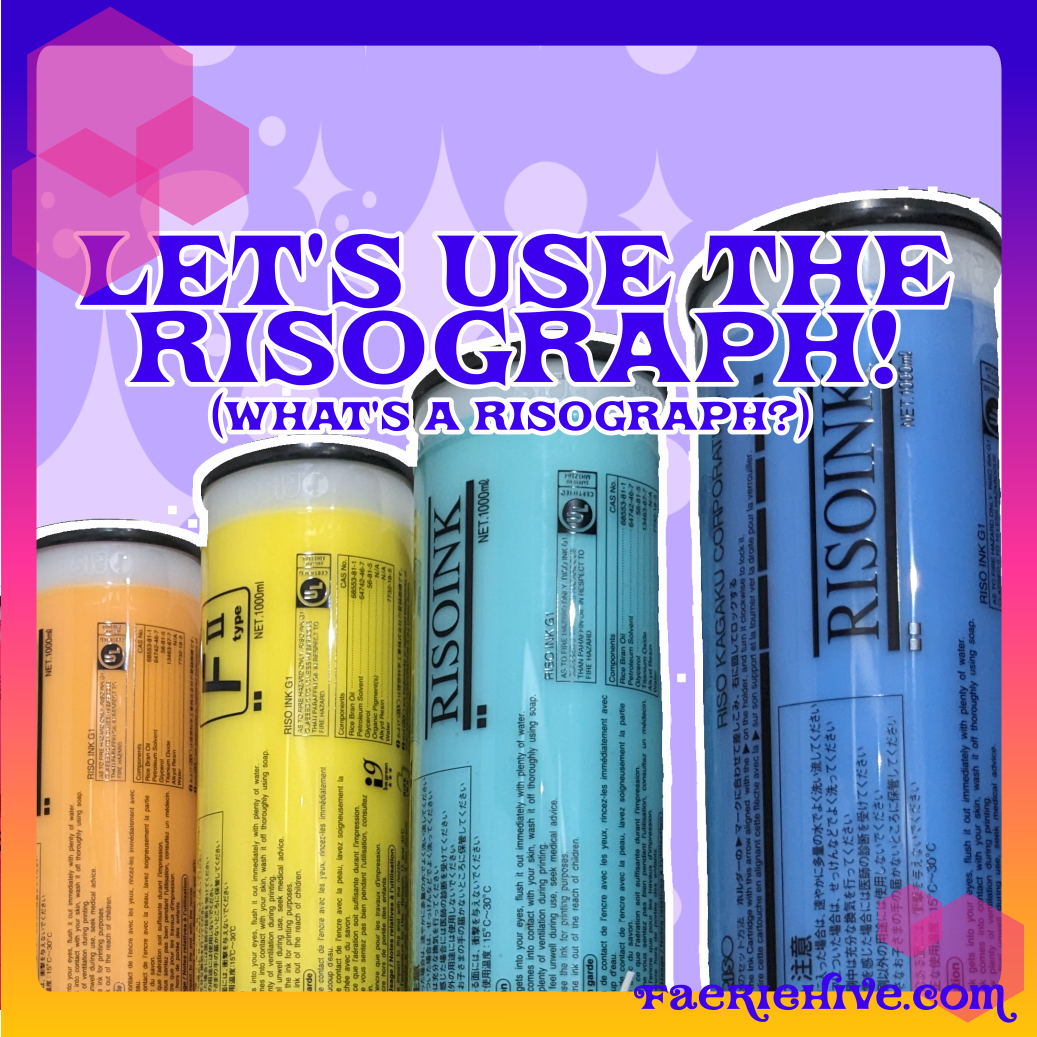
What’s a risograph? How do I use it? Don’t worry, this video doesn’t get technical at ALL, but we get to enjoy a nice visit to Soft Spots Risograph Press in Dallas. Check it out!
So, I picked a very heavy craft to follow. Pottery isn’t exactly light, and I tend to get extra fancy with my displays. For about 10 years I was a face painter at various conventions, birthday parties and what have you, sadly, that did a lot of damage to my back. When you’re in your early 20s, you tend to not fuss yourself with “old people” problems like taking care of your back.
Come Fall of 2022, my second-to-last show of the year, I put my back out lifting boxes of pottery and equipment into my car, and hauling it to the show site. The phrase “I’m too old for this” has never repeated itself over and over so many times in one head.
I needed a way to showcase and move pottery to shows that didn’t murder my body.
Let’s Do This.
Ever since I first saw Andrea Denniston’s Teardrop Build, I became enamored with the idea. Stash everything inside? Hell yes. Trailer becomes display? More hell yes. Similarly, I loved Diana Kersey’s “Foamie” display trailer after seeing it at Texas Clay Festival. No tables to haul, no shelves to assemble, just stow and go. It’s like an infomercial.
Planning commenced, with minimal self-imposed stipulations:
trailer must be able to fit inside buildings that have double doors or cargo entrances
trailer must be light enough for me to manipulate/move
trailer must be able to display 95% of my work
The venture into Trailer Land began with installing a tow bar onto the Subaru. The resources at E-Trailer.com are great, they have clear instructional videos that allow you to not pay $200+ at U-Haul to have them install a tow bar as was recommended by far too many people.
Wow it looks naked in retrospect.
Use that $200 towards a Harbor Freight trailer frame. I picked me up one of these bad boys for a little over $400. Buying new, it was the cheapest. Had I shopped around, I might’ve been able to pick up a good second-hand trailer for a reasonable price. My reasoning was that building it would give me a better understanding of how the thing worked. Plus building stuff is fun.
I wasn’t especially sure how well me and the trailer would get along, so it went on a “test trip” to an event in Austin with all my equipment, sans pottery, strapped to the back. The only thing I added was a 3/4″ plywood floor.
To Austin! Our nation’s state’s capitol!
Strapped on were my three display tables, tent, box with tent roof/walls, and box with display shelves. (Shelves flat pack.)
At this point, I was too nervous about the leaf spring shocks providing any protection to my pottery, so it traveled in the car.
The inaugural voyage got me used to pulling a trailer of stuff, how it moved, and the fact that I cannot for the life of me reverse the car and get the trailer to reverse.
Wood is Expensive
It WOOD (haha) have been great to be able to find lots of salvage and build with it. But I live in a post-apocalyptic suburbia where people charge a premium for garbage fence pickets on NextDoor. Fortunately, I had plenty of my own scrap, PLUS a retired bed platform I had constructed about a decade earlier. This isn’t to say I didn’t plunk down a chunk of change on new wood and needed hardware; you can only dig so much out of your personal woodpile.
Base. (Bottom was painted with glossy oil-based paint.)Frame up.Frame up.More frame, featuring braces.First wall!More walls!Walls, now with doors!Added another door, and fiddling with roof ideas.Hey, it kinda looks like a house.Started adding fancy trim.More fancy trim.Went bankrupt from all my trim spending.
No, I did not follow any specific building guidelines. I eyeball a dangerous amount of measurements, though in general rulers and cuts weren’t too wonky.
Let’s 3D Print
Terrorizing school children and evening dog walkers.
At this point, the majority of the construction was done. Originally, I had planned to put shelves on hinges that latched up, so I could pull up to an event, unlatch the shelves, and boom. Put up pottery. However, after a test run, I was concerned about the amount of rattling and jiggling outside shelves would take.
I took the base on a test run throughout the neighborhood, doing my best to emulate MarioKart. Topped it off with some donuts in a school parking lot, and I was satisfied that the house wouldn’t tip, and had no tendency to lean one way or the other.
I decided to go with French cleats for hanging my shelves. That way I could add more, put up less, and not worry about them becoming damaged while in transit.
This photo makes it look like I printed out one with no issues.Cleat V1.0PROTIP: Don’t test your cleat brackets by putting up a can of paint.Cleat V2.0
French cleats are pretty reliable as far as holding weight, but mine were kinda skinny, so I added tabs to prevent horizontal motion from happening. Unless someone trips and falls into the house, it ain’t goin’ no where. The brackets pop off for transit and ride inside the house with the shelves, all is well. Each bracket took around five hours, I printed two at a time, each side had eight brackets. My calculator tells me that’s roughly 240 hours of print time. That comes out to…TEN DAYS to print the brackets. Man. My Prusa needs a vacation.
Start Paintin’
At this point, the Texas weather was unseasonably warm for days at a time. This means it’s time to start slappin’ down paint!
First coat is always the worst.UGHPainting sucks I hate it
UGH I forget how much painting solid colors sucks. This step not only involved painting, but also patching, caulking, sanding, etc. The WOOOOOOOOORST. You only THINK you bought a decent piece of plywood until you have to paint that sucker. Then you decide your next project will be to go back in time and hit yourself with a bag of cement for picking the world’s lumpiest, bumpiest, most uneven sheet of wood known to mankind.
Painting Sucks Let’s 3D Print Again
I wanted shingles for the roof. I looked. And looked. For some crazy reason, people only want to sell you enough shingles to get started covering an entire regular-sized house. People building 4′ x 4′ homes need shingles too, people! After more dead-ends than I would’ve liked, I printed out a test leaf-shaped shingle.
It’s like a real leaf!100% realistic silky copper!
Test leaf came out perfectly. I liked the shape, I liked the look, and it had the unanticipated benefit of being able to be shaped by heating it with a heat gun. I guess we’re doing this. Rough calculations say we’ll need…SEVENTY TWO LEAVES to cover the roof. Time for a trip to Microcenter, I guess.
Oh so we’re doing dual-color.Complete with holes for attaching.Test layout: very leafy.
Each leaf took two hours to print, not counting the time spent manually changing filament colors. (I even cobbled together some gcode to make it spit the filament back out at the end of a print to save me that step.) You get out your own calculator to figure out how long the print time was for the leaves because SIX DAYS OF PRINTING GOOD GOD
I really need to do some printer maintenance.
Actual Painting
Next is fun painting. Still laborious, but fun. Barring cold days, it probably took around two weeks to get all the painting done. I opted to go with regular ol’ craft store acrylic paint as A) the trailer would not be sitting in the sun for months at a time causing fading and B) the entire trailer would be getting a clear coat of polyurethane.
I did the rainbow trim first.Wide open spaces.A giant sun facing the rear.
Because the weather was warm/cold/warm/cold, I spent some time doing a bit of 3D printing during the cold. First up, a nice plaque to go over/in the sun on the back of the house.
Have you ever struggled with cutting angles beyond 45° with wood? I have a miter saw and a desire to keep all my fingers, so I couldn’t figure out how to safely cut wood slats for the gables of my little house. 3D printing and a protractor to the rescue! I measured, printed, and got close enough to say “Eh, I’ll fill it in with caulk.” Tada, fake gable supports.
Fine craftsmanship.No one will ever notice.
Back to painting! I like my faeries to have transparent wings, so I did a little airbrushing and cut some wing stencils in order to spray on some color-shift paint for wings. Violá! In the meanwhile, I started to add some black to the roof and trim.
Faerie in red on the left.Delightful sunny day on the back.Cutting some wing stencils in clear plastic.When I look like this, my kids leave me alone with my airborne particles!
Time for…a freeway test run. I’m a member of a makerspace in Richardson, TheLab.ms. Folks on our Discord channel kept asking me how it did on the freeway. My builder sister asked me how it did on the freeway. My experienced father asked me how it did on the freeway.
Uh, I suppose I need to take it out on the freeway.
WHEW I survived.Parked at the backdoor of TheLab.ms!
Opting for a Sunday evening drive, I tooled my not-quite-finished trailer out to TheLab and lo, I arrived safely. Much trailer building discussion was had, and I made it back home in one piece. Huzzah.
Back to painting!
Adding black on the trim.Outlined faerie!Outlined faerie!
Oh. I guess that was a short rest of photos documenting painting.
Shelves! Cleats! Vinyl!
Painting, DONE. Time to add on the cleats and hang the brackets and place the shelves!
First shelf.Cleats installed.Now I just gotta cut the lumber to fit!Topped off with a cute lil’ faux grass mat.
The bottom shelves were a bit of a concern; I wanted them to cover up the wheel wells, and “frame” the house. However, they’re right at knee height, and if someone were to bump them a bit, they might tip. The brackets weren’t enough for how wide I wanted them. Simple solution? I drilled a hole and put a clevis pin through the shelf and wheel well. Shelf isn’t tipping nor is it sliding, and the pin is super fast to install.
Vinyl Letters
I was a bit concerned with visibility at night despite looking like the Studebaker from the Muppet Movie, so I managed to locate some reflective vinyl online. Five minutes on the Cricut later, I had a jumble of lettering to adhere to the house.
This is what vinyl install looks like when you’re trying to save money.Flash on my camera indicates lettering is reflective!Lettering on the side facing cars that will be behind me in traffic.
Not all the vinyl is reflective, just the giant-ass website so people know who to complain to when I cut them off.
Shingle Install
I admit I was waffling on the leaf shingles up until two days before I had to leave for a show in Austin. Would they hold up under three-ish hours of sustained 75mph winds? Did I want to test that? I had screwed three leaves for my test drive to the makerspace, but not an entire roof full.
Screw it, I’ll put ’em all on.
Leaves look good!Slowly bending them with the heat gun.But there’s a lot of potential for flapping.Heat gun and staples: fusing leaves together and adding extra attachment points.First check in Waco, I lost 5 leaves. But that was all!Dangling leaves, no damage!
Using the heat gun to bend the leaves brought an unexpected benefit; it basically fused some of them together, thus eliminating potential flapping in the wind. I lost a few leaves, but way less than expected. Fortunately, it was not noticeable at the show.
Let’s GOOOOOO
Time to play trailer Tetris! Load ’em up! Pack it up! Cram it in! Pottery this time rode in the trailer, tightly packed in with packing foam. Everything else was strapped down with either bungees or straps inside.
Empty!Full!Before leaving, we stopped for donuts.
The top of the car had to hold the tent. It’s just too long to fit into the house! Likewise, I was concerned about my larger ceramic faerie houses being banged around too much. They’re not packed especially tight, and I felt better with them in the back of the car.
It’s Showtime!
Table where I sit with business cards, ready to take your money.PotteryPotteryMore PotteryHey I think this person sells potteryWow pottery
Overall, I’m absolutely pleased and satisfied with this build. It was challenging, used a variety of my skills, and was extremely eye-catching in its final form as a display piece.
Will there be future improvements/additions? Absolutely. But my major goal was to create a transport and display that wouldn’t kill my poor back at the end of the day. I’d say I nailed it.
Addendum: 72 leaves were not enough, nor were 90. I suspect I’ll have to update later with exactly how many leaves create a satisfactory roof.
Next Show
Austin Pagan Pride September 15, 2024 at 10:30 am – 4:30 pm
The VORTEX, 2307 Manor Rd #2135, Austin, TX 78722, USA